
The Monstera plant, often known as the Swiss-cheese plant or split-leaf philodendron, has become a beloved choice among houseplant enthusiasts.
Its striking glossy leaves bring a vibrant touch to any indoor space, making it a year-round delight.
One of the great advantages of Monstera is its low maintenance requirements and its ease of propagation.
If you’re looking to grow your collection or share the beauty of this plant with friends, you’re in luck! There are three straightforward methods to propagate Monstera: planting stem cuttings in soil or water, and air layering.
Let’s explore these techniques as recommended by horticultural experts.
WHEN TO PROPAGATE YOUR MONSTERA
Spring and summer are the ideal seasons for propagation, as these months align with the plant’s active growth period.
However, if your Monstera is kept warm, well-lit, and in a humid atmosphere, you can successfully propagate it throughout the year.
PROPAGATING MONSTERA IN SOIL
- Start by selecting a healthy stem measuring 4 to 6 inches long.
Make sure it shows no signs of pests or diseases.
Use a sharp, clean knife or scissors to cut just below a leaf node.
- Remove the leaves from the lower part of the cutting.
- Allow the cut end to dry for a few hours to form a callus—this helps prevent rot.
- Optionally, you can dip the cut end in rooting hormone to encourage growth.
- Choose a container with a drainage hole and fill it with a well-draining potting mix.
Ensure the container is spacious enough for the cutting.
- Insert the cutting into the soil, burying the node.
- Place the container in a humid and bright location.
In just a few weeks, roots should start to develop.
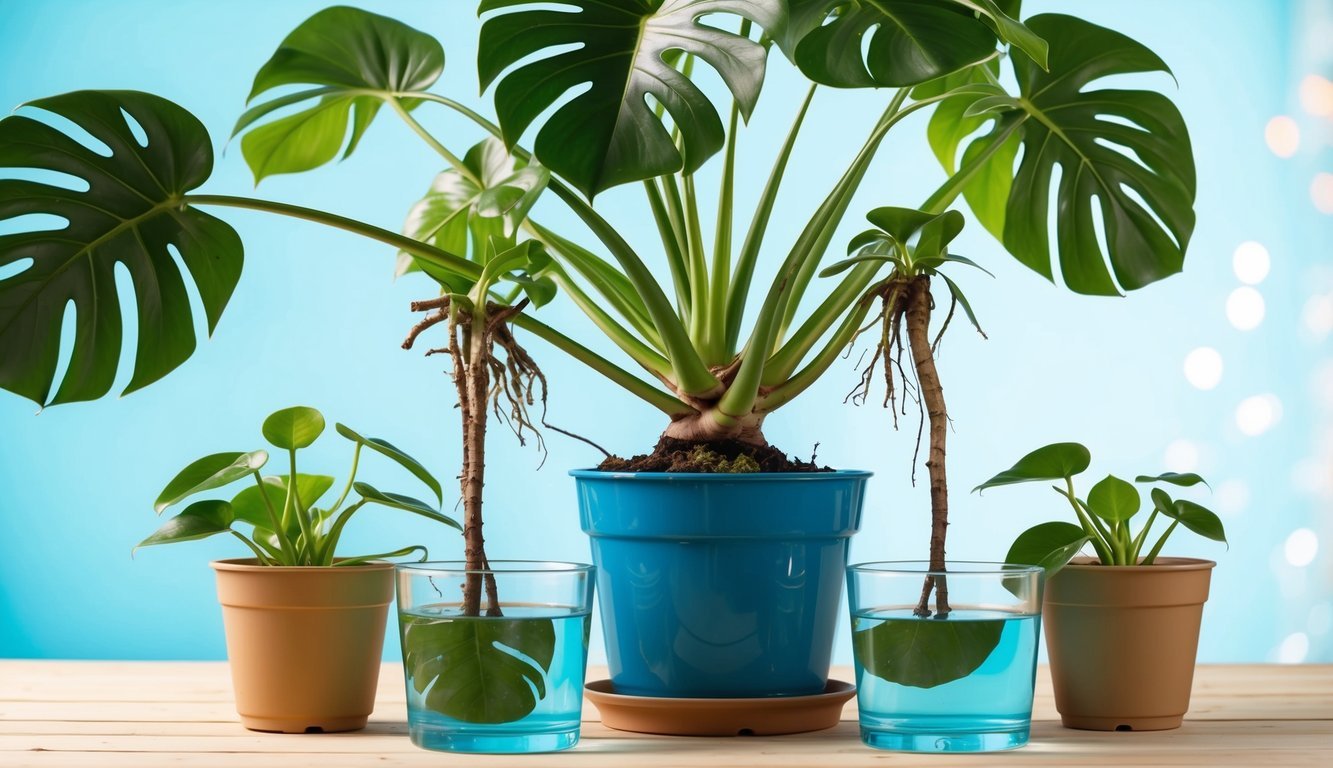
PROPAGATING MONSTERA IN WATER
- Take a healthy 4 to 6-inch stem and cut it below a leaf node using sterile scissors or a knife.
- Remove any lower leaves from the stem to prevent them from rotting in water.
- Fill a glass with either distilled or filtered water, ensuring it can adequately support the cutting.
- Submerge the cut end of the stem in the water, but keep the leaves above the surface.
- Find a bright, humid spot for the glass, and soon enough, you should see roots developing within a few weeks.
AIR LAYERING: AN ALTERNATIVE METHOD
- Look for a strong Monstera stem that has a node with new aerial roots forming.
- Using a sharp knife, create a small notch about a quarter-inch deep below the node.
- Remove the leaf above the notch to direct the plant’s energy towards root development.
- Take some sphagnum moss and moisten it, being careful not to soak it.
Wrap it securely around the notched area, ensuring the node is covered.
- Wrap plastic around the moss and secure it with twine.
- Place the plant in a bright, humid area.
After a few weeks, you should see roots appearing.
- Once the roots are sufficiently established, cut the stem from the parent plant and pot it in well-draining soil.
After propagating, your Monstera cuttings will need extra care.
To ensure they thrive, keep them in bright but indirect light, and maintain a consistent level of moisture in the soil without overwatering.
Transplantation should occur once your cuttings develop a strong root system, usually after four to six weeks.
If propagated in soil, there’s no rush to move them.
However, if the cuttings were rooted in water or through air layering, wait until the roots are about 3 to 4 inches long before transferring them to a pot.
FREQUENTLY ASKED QUESTIONS
- What is a node on Monstera? A node can be found at the junction where the stem meets each leaf.
- Can I propagate Monstera in water? Absolutely! It’s a popular and effective method.
- Which is better for propagation, water or soil? Generally, soil propagation is preferred for optimal growth.
With these expert tips in hand, you’re ready to start your journey in propagating Monstera.
Enjoy the process and the lush greenery that will flourish alongside your efforts!
Source: Marthastewart